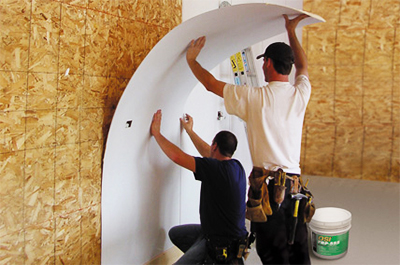
Fiber-reinforced polymer (FRP) panels have gained immense popularity in various industries due to their durability, hygiene, and aesthetic appeal. Whether you’re considering FRP for a commercial kitchen, a healthcare facility, or any other space, understanding the installation process is crucial. This blog post will provide a comprehensive guide to FRP panel installation, covering everything from surface preparation to final touches.
1. Understanding FRP Panels
Before delving into the installation process, let’s briefly understand what FRP panels are. FRP, or fiber-reinforced plastic, is a composite material consisting of a polymer matrix reinforced with fibers. This combination creates a material that’s strong, lightweight, and resistant to corrosion, chemicals, and impact. FRP panels are commonly used for wall and ceiling coverings in environments that require high sanitation standards or are exposed to harsh conditions.
2. Preparing the Surface
The success of any FRP installation hinges on proper surface preparation. The surface must be clean, dry, and free of any contaminants that could interfere with adhesion.
- Cleaning: Remove any dirt, dust, grease, or other debris from the surface using appropriate cleaning agents. For porous surfaces like concrete or wood, ensure they are adequately sealed to prevent moisture from affecting the adhesive.
- Repairing: Address any cracks, holes, or other imperfections in the surface. Fill them with suitable patching material and allow it to cure completely.
- Priming: In some cases, applying a primer may be necessary to enhance adhesion between the surface and the adhesive. Consult the adhesive manufacturer’s instructions for specific recommendations.
3. Choosing the Right Adhesive
Selecting the correct adhesive is vital for a successful and long-lasting FRP panel installation. Consider the following factors when making your choice:
- Surface type: Different adhesives are formulated for different surfaces. Make sure the adhesive is compatible with the material you’re working with.
- Environmental conditions: Take into account the temperature, humidity, and other environmental factors where the panels will be installed. Some adhesives are better suited for specific conditions.
- Panel size and weight: Heavier panels may require a stronger adhesive.
4. Applying the Adhesive
Follow the adhesive manufacturer’s instructions carefully for proper application. Generally, you’ll apply the adhesive to either the back of the FRP panels or directly to the prepared surface using a notched trowel or roller. Ensure even coverage for optimal adhesion.
5. Positioning and Securing the Panels
Once the adhesive is applied, carefully position the FRP panels onto the surface. Press them firmly to ensure good contact and eliminate any air pockets. Use a roller or other tool to smooth out the panels and ensure they are properly adhered.
In some cases, mechanical fasteners like screws or rivets may be required for additional support, especially for larger panels or areas subject to high stress. Follow the manufacturer’s recommendations for fastener placement and type.
6. Sealing and Finishing
After the panels are installed, seal all seams and edges with a compatible sealant to prevent moisture intrusion and maintain hygiene. Trim any excess panel material with a sharp utility knife or saw.
7. Final Touches
Clean the installed FRP panels with a mild detergent and water to remove any adhesive residue or fingerprints. Inspect the installation for any imperfections and address them as needed.
Additional Tips:
- Measure twice, cut once: Accurate measurements are crucial for a seamless installation. Double-check your measurements before cutting any panels.
- Use the right tools: Having the proper tools on hand will make the installation process smoother and more efficient. This may include a notched trowel, roller, level, utility knife, saw, and safety equipment.
- Work in a well-ventilated area: Adhesives and sealants can release fumes, so ensure adequate ventilation during installation.
- Consider professional FRP installation: If you’re unsure about any aspect of the installation process, don’t hesitate to consult a professional FRP installer.
By following these guidelines and taking the necessary precautions, you can ensure a successful and long-lasting FRP panel installation. If you have any further questions or require assistance, don’t hesitate to reach out to a qualified professional.

